
Thursday, October 27, 2011
Cutey pie
Bebe's very clean and shiny...this picture is after her spa day where her coat got deep conditioning and all of her knots were trimmed. I took her out on a long walk where she smelled the flowers, tried to eat food off the sidewalk (the "leave it" command seems to work), and said hello to our neighbor who is a volunteer for the Central Park Rose Garden. She is tired out but has a mischievous glimmer in her eye...we are still working on trying to trim her nails.

Tuesday, October 25, 2011
26 hours in Denver
Last week I spent 26 hours in Denver for work. it was fast in and fast out. i didn't get to do any sightseeing but here's the view from my hotel room on the 16th floor...
They had snow the week before I arrived but on the day that I was there - it was clear blue skies and all I needed was a light coat.

They had snow the week before I arrived but on the day that I was there - it was clear blue skies and all I needed was a light coat.

Sunday, October 23, 2011
Yes, we made that yummy sushi!
here is a photo from week 2 of our sushi making adventure. This week we made nigiri - tako, saba, salmon, spicy scallop, yellowtail, and more. We also made little sushi cups with tobiko and seaweed salad! Picture from week 1 to come...
 the nigiri class was a little more challenging. It takes a lot of practice to get the rice balls (that the fish sit on top of) just right. The rice kept sticking on my fingers instead of sticking on the ball! Now I know why they have those molds at the japanese dollar store. Also, we learned how to slice the fish but realistically, i think i will look for pre-sliced fish or skip this type of sushi altogether. Also learned that the belts (or strips of seaweed) only go around the cooked items. the raw ones don't get a belt!

Thursday, October 20, 2011
Virna's Lavender Wand
Virna recently frolicked in some gorgeous lavender fields. She gathered so many that she created and gave me a lovely lavender wand. it is now hanging in my closet and I love getting a fresh whiff of it when I am standing in my closet figuring out what to wear for the day.

You can learn to make your own lavender wand here.

You can learn to make your own lavender wand here.
Wednesday, October 19, 2011
Bebe loves her bed
A few of you have asked how little Bebe is doing since her debut about 6 weeks ago. Here's some photos of our lovely furry friend in her bed. It's quite rare to catch her on her bed as she likes to sneak up on us around the house. Her favorite pastimes include playing with her toys, dancing for treats, sunning by the window, and popping up in unexpected places!
 |
| A rare quiet moment for Bebe |
 |
Can't a girl get some rest without the flash in my face? |
Tuesday, October 18, 2011
What's in Your Bento Box?
Ok...it's been a while since I've posted my lunches. Truthfully because I haven't been packing lunches. I have traveled for work, worked offsite (which doesn't require a packed lunch, ate out with friends...all excuses I know. Anyway, today's lunch is veggie meatballs, broccoli, and bruschetta sauce on a bed of polenta. How's that for healthy?


Saturday, October 15, 2011
Tub Time Whoopie Pies

This yummy recipe is from The Natural Beauty Workshop. I've been on a "soapy" dessert kick lately (see my marshmallow soap here) and want to try this next.
Bath Tub Whoopie Pies
This is a three part recipe. So much so, that the third part will have to be completed at least 24 hours after the first. To start this recipe, we'll begin with the "chocolate cookies" that make up the top and bottom of the Whoopie Pies.
Phase One: Making Cookies

Ingredients
Dry Ingredients
3/4 cup Epsom Salt
1 cup Baking Soda
1/2 cup Citric Acid
1/2 cup Whole Milk Powder
1/2 cup Oat Flour, Fine
1/2 cup Cocoa Powder
1 teaspoon Umber Oxide
Wet Ingredients
1 ounce Organic Virgin Coconut Oil
2 ounces Cocoa Butter, Regular
1/4 ounce Dark Chocolate Supreme
Fragrance Oil
Directions
Combine all dry ingredients in a large mixing bowl. Stir the ingredients very well. There should be no clumps in the mixture. To achieve a completely even color, as shown in the picture, you may need to put the powders in a food processor, blender or other closed topped mixer.
Melt your Cocoa Butter in a double boiler, or in the microwave. If you use a microwave to melt your Cocoa Butter keep a close eye on it. Microwave in short 5 second bursts and mix well in between each burst of heat. In small mixing bowl combine the melted Cocoa Butter with your other wet ingredients. Stir well.
Slowly pour your liquid ingredients into the container with your dry powders. Stir this mixture well, making sure to distribute the moisture quickly and evenly.Add just enough liquid to make the mixture packable. This is a similar technique to making Bath Bombs.
Cover a baking sheet or sturdy tray with a sheet of waxed paper. With clean hands, knead the Whoopie Pie mixture. Make small balls of "dough" with your hands* They should be roughly the size of a clementine or a small lime. Separate each ball of dough into two equal portions, making each portion into it's own smaller ball of dough. Gently press the balls of dough onto the cookie sheet. Use your fingers to press them into small circles or domes. Keep each set of two cookies together so that you can match them up during phase two of the recipe.
Allow your cookies to dry for about 24 to 48 hours. The longer they sit, the better. They will become harder and more durable as time passes. Make sure your cookies sit in a cool, dry place. Humidity can be disastrous to this recipe.
*Note: If your "dough" is not sticking together try adding a little more melted Cocoa Butter to your mixture. If it is too slimy to work with, try adding more Oat Flour.
 Phase Two: The Icing on the Cake
Ingredients
1 cup Shealoe Butter
1 teaspoon White Kaolin Clay
1 teaspoon Cornstarch
2 teapsoons Beeswax, White
1 teaspoon Buttercream Fragrance Oil
Melt the Beeswax in a double boiler. Once it has completely melted, remove from heat and add the Shealoe Butter. Shealoe must be melted gently or it can be damaged. Make sure to mix it continually as it melts. When the Shealoe has liquefied, add the Cornstarch and the Kaolin Clay to the double boiler, continually whipping as the mixture cools.
As soon as the mixture in the double boiler is completely mixed and uniformly melted, pour the contents into a large mixing bowl. Beat the mixture until it becomes cool using an electric mixer or a whisk. When the mixture cools to room temperature add the Buttercream Fragrance Oil and mix once more. The mixture will not set up and harden as soon as it becomes cool, this can take up to twenty four hours. While the mixture is cool, but still very soft, transfer it into a pastry bag. Make sure the tip and the open end of the bag are properly sealed and leave your mixture in a cool dry place until it is ready for the next phase of the recipe. Leaving the mixture in the refrigerator is unnecessary as it may cause the "frosting" to become too hard to use.
 Phase Three: All Together Now
Over the next twenty four to forty eight hours you should check your cookies periodically to see how quickly they are hardening up. When they are firm enough to pick up, turn over and handle without crumbling they are ready for the final phase of the recipe.*
Also keep an eye on your "frosting". If you made it the same day that you made your "cookies" it should be quite firm by the time your cookies have hardened. Apply a frosting tip to your filled pastry bag to get started. You'll be frosting every other cookie, leaving half of the cookies to top the Whoopie Pies. Start frosting from the center of your cookie, drawing a swirl to the outside edge. It won't take very much frosting for each Whoopie Pie. When your cookies are frosted, take their corresponding un-frosted cookie and place it on top. This completes the Whoopie Pies! You may want to give them an extra day or two after you frost them before giving them out or attempting to ship them anywhere. That should give them plenty of time to harden up.
*Note: Due to the humidity or dryness of the air this hardening time may vary. If the weather is too hot or humid this recipe may fail.
Usage
Using these sweet little treats is as easy as pie. Just drop one Bath Tub Whoope Pie into the bath tub for a deliciously fizzy treat. To make your treats last longer, try using 1/2 a Pie at a time.
Packaging
Packaging Bath Tub Whoopie Pies can be almost as fun as making them. Cello bags tied with colorful ribbons or bakery and candy boxes would make lovely presentations. Just be careful to mark them well or someone is bound to take a bite! It is also important to keep the Whoopie Pies dry. Make sure to use packaging that is as air tight as possible.
**Note: To create an all natural version of this recipe simply leave out the fragrance oils and colorants. The natural color of the Cocoa Powder and the aroma of the Cocoa Butter will provide a hint of chocolate scent and brown pigment. Also, if you would like to make a vegan variation, the Beeswax can be substituted for 1 teaspoon of Candelilla Wax. The Whole Milk Powder can also be replaced with Coconut Milk Powder or additional Cornstarch. Please be aware that making any changes such as these to the original recipe will alter the results.

Thursday, October 13, 2011
Jumping Jalapenos from Jeong's garden

Fresh jalapenos add a nice kick to regular food - just watch out for the seeds! I recommend chopping them with disposable gloves and avoiding the seeds. Also, avoid rubbing your eyes after touching the seeds at all costs - sometimes we subconsciously rub our eyes but I take extra care to not do that while cutting jalapenos, habaneros, or other things that end with "os" :-)
I added these jalapenos to quesadillas, my breakfast eggs, a can of vegetarian chili, ready-made salsa, rice dishes, teriyaki noodle bowls, corn bread, and the list goes on...
What do you add jalapenos to?
Monday, October 3, 2011
Beeswax Sand Candles

Tools and MaterialsBeeswax, 1 pound per candle
Candle dye
Candy thermometer
Scissors
Wooden spoon
Assorted molds with flat bottoms
Sand
Paintbrush
Wooden craft sticks
Large plastic container or bucket
Square-braided cotton wicking, number 4
Candle dye
Candy thermometer
Scissors
Wooden spoon
Assorted molds with flat bottoms
Sand
Paintbrush
Wooden craft sticks
Large plastic container or bucket
Square-braided cotton wicking, number 4
Sand Candles How-To1. Place beeswax in a double boiler over medium heat. Each 1-pound piece will yield a 4-inch-tall, 3-inch-wide pillar candle. Monitoring with a candy thermometer, heat beeswax to 175 degrees. For a heavier coat of sand, heat the wax to 190 degrees.
2. Add about 1/8 of a cake of dye per 1 pound of wax. Blend with a wooden spoon. To test the color, dip a wooden craft stick into the wax, and allow to dry. Add more dye in small pieces until you achieve desired color, remembering the finished color will be slightly darker than the stick.3. Combine sand with water by mixing with your hands until sand packs firmly enough to hold an imprint. Cover bottom of container with several inches of sand. Set mold on top, and pack additional sand tightly around it, making sure mold stays upright. Grip mold firmly, and carefully ease it straight up and out of the sand. If the sand wall crumbles, mix in a little more water, and begin again.
4. Cut a piece of cotton wicking to several inches longer than the height of the candle, and dip it into the melted wax to stiffen it. Use a pencil to make a hole in the bottom of the mold. Place one end of the dry wick in the hole, and bury it, using the pencil.
5. Making sure the wick stands upright and centered, pour the wax into the mold in a slow, steady stream. Don't pour too fast, as the wax will make a dent in the sand. If you are making more then one candle, return the wax to the stove between pours. Let the candle set until completely cool (overnight, if possible), and remove it. Dust off excess sand with a paintbrush, and use scissors to cut off the excess wick and wax at the base.
From: Martha Stewart
Saturday, October 1, 2011
What is Black Drawing Salve?
Black Drawing Salve has been used for centuries to provide relief for discomfort associated with minor skin irritations. Uses for ages to draw out splinters, stingers and boils. I first heard about black drawing salve from my crafty friend Bonnie Bartley. Read about her black drawing salve project here:
Black drawing salve is a traditional old time country remedy. I have formulated this item based on recipes found in centuries old historical documents combined with Pennsylvania Dutch herbs.

The main ingredients are locally harvested Amish bee's wax, olive and jojoba oils infused with traditional herbs along with a little pine tar, activated charcoal, Vit E. and kaolin clay.


Chickweeds are edible herbs that are are very nutritious, high in vitamins and minerals. Chickweed contains Ascorbic-acid, Beta-carotene, Calcium, Magnesium, Niacin, Oleic-acid, Potassium, Riboflavin, Selenium, Thiamin, and Zinc. The entire plant is used by herbalists to aid minor skin conditions.
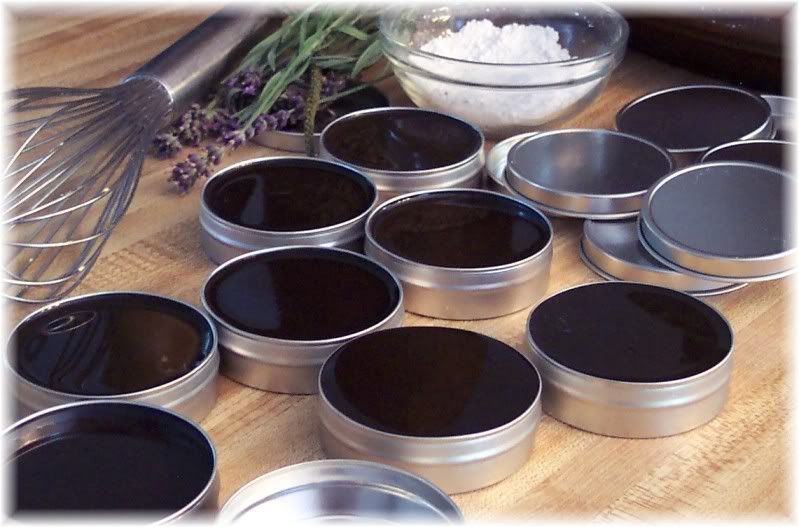
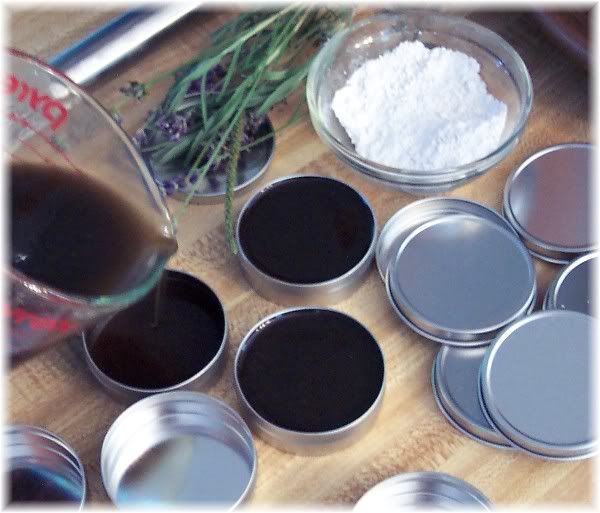
The final preparation consists of blending pine tar, kaolin clay, a small amount of lanolin and Vit E into the herbal infusion. The addition of melted pure bee's wax creates the soft ointment consistency that is poured into recyclable tins ready for use.

Black Drawing Salve is a strongly scented product. It is all natural. This balm is not intended to replace medical advice and is not for extended use, if irritation develops, discontinue use.
Black drawing salve is a traditional old time country remedy. I have formulated this item based on recipes found in centuries old historical documents combined with Pennsylvania Dutch herbs.
The main ingredients are locally harvested Amish bee's wax, olive and jojoba oils infused with traditional herbs along with a little pine tar, activated charcoal, Vit E. and kaolin clay.
Comfrey Root is a useful and valuable herb. Traditional herbalists apply the powdered root of comfrey to minor wounds, insect bites and bruises. It can be used in baths as an astringent and to soften the skin. The roots, leaves, and extracts of comfrey can used in salves and ointments.
The herb plantain is often considered a weed. It has a gentle astringent action, which soothes minor wounds, blisters and rashes.
The University of Maryland Medical Center notes that plantain has a reputation as an herbal pain reliever for the stings or bites of insects. Simply mash a leaf to release its juices and apply to the bite or sting. Plantain also helps with poison ivy, simply rubbing
a leaf on affected skin helps ease itching.
Chickweeds are edible herbs that are are very nutritious, high in vitamins and minerals. Chickweed contains Ascorbic-acid, Beta-carotene, Calcium, Magnesium, Niacin, Oleic-acid, Potassium, Riboflavin, Selenium, Thiamin, and Zinc. The entire plant is used by herbalists to aid minor skin conditions.
Common burdock, lavender, chamomile and rosemary complete the herbal additions to the cold oil infusion.

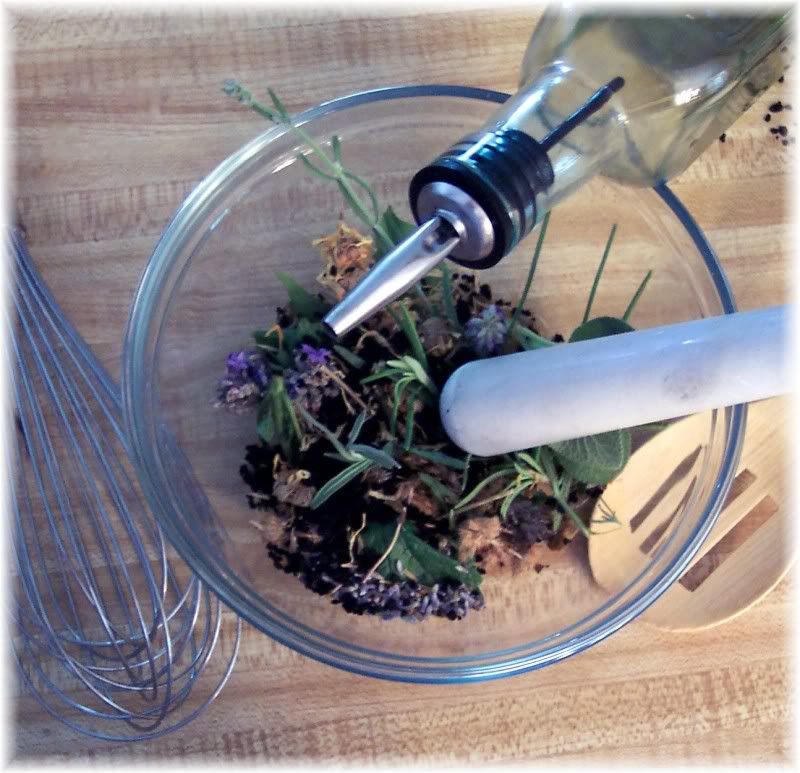
My garden and wild harvested herbs are air dried then crushed with some activated charcoal. The charcoal acts as an abrasive to aid in pulverization and release the beneficial essential oils. The slurry is left to macerate in olive oil for 5 days then strained three times through layers of cotton cheesecloth.
The infused oil is used in the making of the salve.
The final preparation consists of blending pine tar, kaolin clay, a small amount of lanolin and Vit E into the herbal infusion. The addition of melted pure bee's wax creates the soft ointment consistency that is poured into recyclable tins ready for use.
Black Drawing Salve is a strongly scented product. It is all natural. This balm is not intended to replace medical advice and is not for extended use, if irritation develops, discontinue use.
You can also buy Bonnie's salve here for $12/tin (2 oz).
Subscribe to:
Posts (Atom)

