Ingredients
21 oz Clear Soap Base
3 oz White Soap Base
OR buy all of the ingredients you need just by clicking on the “Buy It Now” icon below.

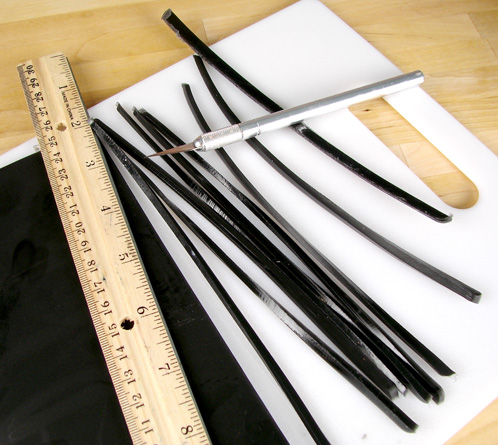
ONE: Prep the watermelon “seeds” by melting 2 ounces of clear soap base and mixing in a couple drops of liquid black. Pour the soap into one side of the glossy tray mold and let cool. Once the soap has cooled, release the soap from the mold and use a ruler and an craft knife to cut thin strips of black. You’ll need five long slivers.
Hint: The liquid glycerin adds some pliability to the soap so we can bend it with out breaking.
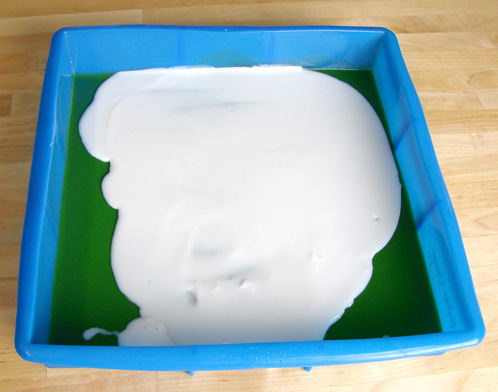
THREE: For the white layer of the rind, melt 3 ounces of white soap base and mix in .3 ounces of liquid glycerin. Let the white soap cool to 125-130 degrees, spritz the cooled green layer of soap and pour the white soap down the middle of your mold.
Tip: I wanted the white section of the rind to be super thin. Three ounces of soap isn’t quite enough to cover the entire bottom of the mold so make sure you pour the soap down the middle of the mold. It’s ok if the sides are not covered in white.
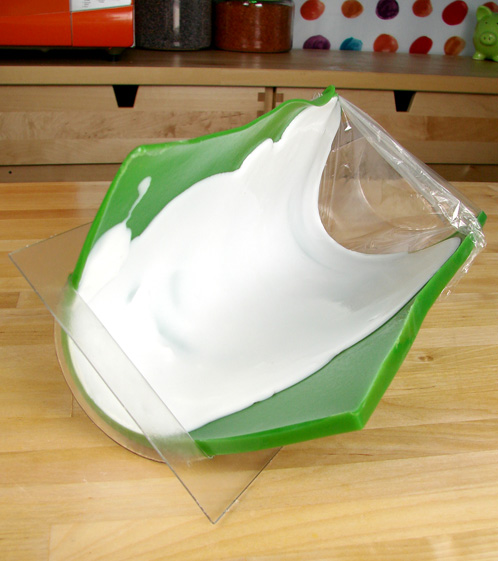
Tip: See how my mold is tipping a little bit? You’ll need to find something to prop up the mold. I used two small matching bowls.
FIVE: To make the sweet, inside of the watermelon, melt 12 ounces of clear soap base and mix in .5 ounces of watermelon fragrance oil. For the fantastic pink color, I combined non-bleeding red with red blue mica. Mix well and let the soap cool to about 130 degrees and have some plastic wrap on hand to cover the soap to keep it warm between pours.
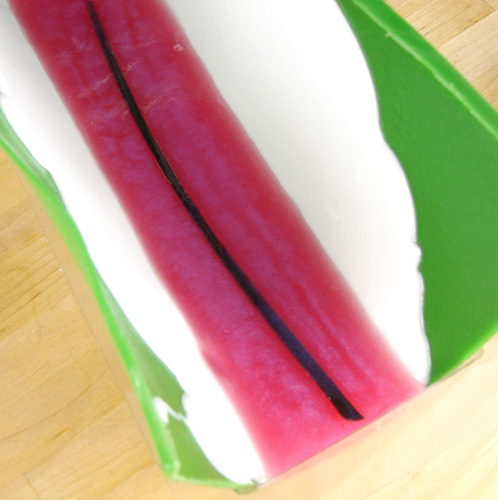
SIX: Spritz 1 long black sliver of soap and the white soap layer in the mold. Then pour about 1/3 of the pink soap. Place the long black strip of soap into the wet soap. Spritz with rubbing alcohol to get rid of any air bubbles. Then cover the remaining pink soap with plastic wrap to keep it warm. Let this layer cool for about three minutes and repeat this step two more times. On the second pour add two of the black slivers (one on each side of the original) and on the third pour add the last two black slivers (again on the outsides of the previous pour).
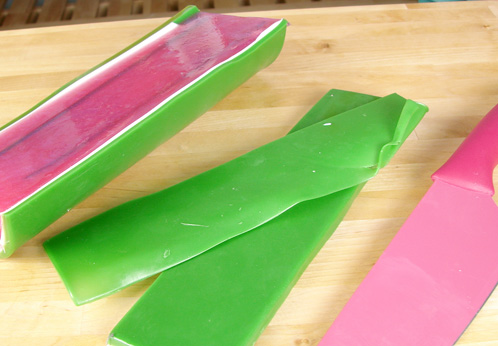
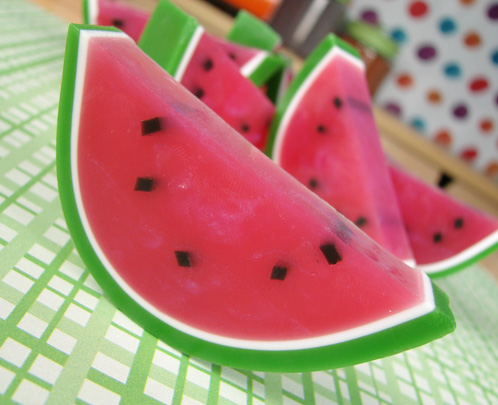
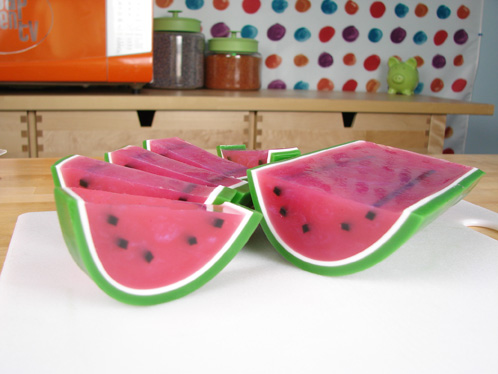
SEVEN: Once the juicy soap has cooled, unmold the soap and carefully slice off the long, green edges with a knife (and put it in your scrap soap bin). Then slice the watermelon in to guest size wedges.
Original post from: http://www.soapqueen.com/personal-ramblings/juicy-watermelons-slurping-up-summer-2/


No comments:
Post a Comment