Showing posts with label kids. Show all posts

Wednesday, September 25, 2013

Angry birds fly in for a visit

Stephanie and I recently made these little angry bird magnet projects with the kids. While this does require manual dexterity to cut and glue the small pieces together, and also a little bit of patience, it is quite a fun and easy project for the 8 and up set.  The kids had fun making them and it was interesting to see the variety of facial expressions on these cute little birds!

Materials needed for the project
Materials:

  • pom pom balls - in angry bird colors: red, teal
  • wiggly eyes
  • small scraps of felt (yellow, black, red, teal)
  • scissors
  • glue
  • wooden sticks to help apply the glue (if you are not using a hot glue gun)
  • magnet backs (optional)


Instructions
1. cut shapes from the pieces of felt - triangles for a beak and thin rectangles for eyebrows, and a squiggly cut for the comb on the bird's head, if desired.
2. glue the eyes, beak, eyebrows, and comb on the pom pom ball
3. if desired, glue the magnet backing onto the pom pom ball also.
4. let dry for 15 minutes and enjoy!

Finished Angry Birds on the white board


Friday, December 23, 2011

Candy Cane Mice

This is an easy, inexpensive, and sweet craft for preschool classes.  They can be used as holiday gifts, gift toppers, party favors, etc.  For a twist, use heavyweight paper instead of felt.  Kids of all ages will be doing the nibbling when these sweet mice are around. A combination of two holiday icons -- mice and candy canes -- these tiny fabric creatures with their red-and-white-striped tails make fitting favors at a holiday dinner or delightful gifts for children to give to friends and relatives.

Mouse How-ToOn a photocopier, enlarge mice template by 150 percent; cut out. With a pencil, trace ears and body onto felt; cut out. Cut inner ears and a dot for a nose from felt in a contrasting color, cut dots for eyes from black. Glue the face and inner ears in place. Make slits in body for ears and candy-cane tail where marked; to make cutting easier, fold felt across center of slits, and snip. Slip ears through slits at front; then slide wrapped candy cane through body slits, tucking the end underneath the ear piece at the back. 

For variation, you can use 5mm pom poms for the nose instead of felt and 7mm googly eyes.  you can also use foam sheets if you don't have felt or heavyweight paper.

Source: Martha Stewart

Saturday, June 25, 2011

Kids Craft - ice cream in a bag

We made ice cream in a bag with the kids recently and they all loved it!
Ingredients (for one scoop of ice cream)
  • 4 oz whole or low fat milk or combination of milk and half and half (if you use a nonfat milk, your end product will be icier and less creamy)
  • 1/4 tsp vanilla extract (for other flavors, use candy flavor oils)
  • 6 tablespoons rock salt
  • ice cubes
  • few drops of food coloring (optional)
  • sprinkles (optional)
  • quart and gallon size zip lock bags
  • towels to spread on the table - this can get messy (water-y), esp as the ice melts.
Procedure
steps 1 and 2
1. In the large gallon size ziplock, place your 6 tbsp of rock salt,
2. In the smaller ziplock bag, place your milk, sugar, flavoring, and 1 or 2 drops of food coloring.  You may want to double bag the smaller ziplock.  Make sure the small zip lock bags are sealed and place in the larger bag. 
 3. Add the ice cubes tothe larger bag, seal it and start shaking.  You will need to shake for 15 to 20 minutes. 

step 3 - kids shaking vigorously


4. Continue shaking the bags until the ice cream solidifies and is a creamy texture. 
5. Snip a corner off the smaller zip lock bag, and pipe the ice cream into a cup or bowl, add sprinkes and enjoy!
cherry cola flavored ice cream w/red food coloring

Squeezing ice cream into the cup

add sprinkes and enjoy!

Thursday, June 16, 2011

Crafts with Kids: Make your own Dominoes!

The Bee rock project was very popular!  Here's another project involving rocks and games.  You can make your own natural dominoes by using smooth flat stones and a white paint pen.  Even white out/liquid paper will do!  Gather 28 rocks and create the dots and lines.  Begin by drawing a line across the center of each. Then on either side of the line, mark with two sets of dots in every combination from zero to six.  You can store them in a drawstring pouch for your next game!   This is a great idea for a group of kids - each can work on a few dominoes and then they can play together when they are done creating them!
 Idea and photo courtesy of Martha Stewart!

Saturday, June 11, 2011

Crafting with Kids: Fun & Fruity Facial Masks

Here's a fun recipe to make and use with children from the Natural Beauty Workshop. They will love mixing and smashing the soft fruit into a pulp, not to mention smearing the messy concoction across their little faces.  Make sure to keep childhood allergies in mind when picking the ingredients for this recipe, as some kids are allergic to certain fruits and berries.
Banana Ingredients
Directions
In a small mixing bowl, combine 1 teaspoon each of White Kaolin Clay, Oat Flour, and Powdered Milk.  Add 3 - 4 tablespoons of fruit (choppped so that it will mash easily), and a few drops of water.  Give your child a large spoon or spatula to mash with and let them go to town, squishing the fruit and powders together into a beautiful mess.  Carefully apply the mixture to your faces, avoiding the eyes, mouth, and nostrils.  Allow the mask to dry for 5 - 10 minutes, then gently wipe off the mixture with a moist washcloth.  Rinse your faces well, than apply any toner or moisturizer you like. Be sure to take some pictures of your mini spa day.  You'll look adorable with matching fruity faces.
Strawberry
Do you have a favorite skin care recipe that you enjoy making with your kids? 

Friday, June 10, 2011

Father's Day Gifts - Funky Luggage Tags

Here's a cute and functional gift for dad from the kids!  Great way to pick your luggage out from the craft and have dad remember you while he's away.
(This idea by Deborah Way From FamilyFun Magazine )

Materials
  • Felt
  • Tag templates
  • Scissors
  • Glue
  • Dimensional paint
  • Grosgrain ribbon
  • Clear plastic container
  • Card stock
  • Marker
  • Craft knife
Instructions
  1. Funky Luggage Tags - Step 1 Download the tag templates. Cut the pieces from felt as directed, then follow the instructions for your chosen tag below. Note: For the glue, we recommend Beacon's Kids Choice, which works well with felt.
  2. Monster: Add eyes with dimensional paint. Glue felt teeth inside the mouth.
  3. Guitar: Add details to the body and head with dimensional paint. Fold a 20-inch-long grosgrain ribbon in half and paint strings from the fold to 3-1/2 inches up. Glue the head to the end of the strings.
  4. Baseball: Add stitches with dimensional paint.
  5. For all three tags: Cut 2- by 3-inch pieces (3 by 4 inches for the monster) from a clear plastic container and from card stock. Using the window in your felt piece as a placement guide, write your recipient's name and address on the card stock. Run a line of glue along the outer edge of the larger felt piece, leaving the top free so that you can slide out the paper if needed. Attach the second felt piece. Let the glue dry, then slide the paper and plastic cover inside. Use a craft knife (a parent's job) to cut a 3/4-inch-wide slot near the top of the four layers. Thread grosgrain ribbon through the slot.

Saturday, May 14, 2011

To Infinity and Beyond!

Space Stamps from Mongolia
I love the color, the whimsy and the fun nature of these stamps from Mongolia circa 1973.  They highlight US and Soviet spacecrafts, and were found in a stamp shop in Istanbul!  Click on the link to get a high res version that you can print and frame - perfect for a kids room, game room, classroom or cubicle. 

Friday, May 13, 2011

Bees in Your Garden

Amanda strikes again with these cute little bees made from rock.  One could also make ladybugs, frogs, or other garden creatures.  Click here for the step by step tutorial on rock bees.
You will need:
  • yellow, black and white paint
  • smooth rocks
  • paint brush
  • a little bit of wire
  • Glue gun
A toothpick may come in handy when you are dotting the black of the eye.
you wrap the wire around the finger to get the nice loop and use the glue gun to adhere the wing.  You can prop it up with a pony bead while it is drying.

Sunday, May 8, 2011

Sewing Kit in a Jar (Repackaging Idea for Mothers Day!)

Another great idea from Martha!  And you probably have the components at home already.  You will need a mason jar (think old spaghetti sauce jar - I have lots of those lying around).

With just a little retrofitting, an old-fashioned Mason jar can become a new sewing kit with a built-in pincushion on top. To begin, separate the lid's sealer and screw cap. Trace around sealer on cardboard. Using a compass, draw another circle on linen or cotton, 1 inch larger in diameter than the first. Cut out both circles; make cushion by placing batting between fabric and cardboard. Turn screw cap upside down, and apply hot glue to inside edge of rim; quickly press cushion into lid until cloth protrudes smoothly above screw cap's opening and cardboard is flush against rim. Apply hot glue around edge of cardboard, fold over excess fabric, and press down. Glue top of sealer to cardboard. Fill jar.

Look around the house for spools of thread, sewing needles, fabric swatches, mini scissors, and voila!  instant gift through the magic of recycling and repackaging.   If your mom is a knitter, you can do a similar knitting kit in a jar - filling it with stitch holders, markers, crochet hook, double pointed needles, etc.

Another variation on this is to create little tickets or coupons with things you will do for mom.  Put them all in the jar and as she picks out a coupon, you can help her with that item.  Some examples for kids of all ages: "I will clean up my room" or "I will do all my chores without being asked" or  "One breakfast in bed coming up" or "Nice dinner at your favorite restaurant" or "Computer help at any hour of the day" - anyway those are starters - I'm sure you can come up with even more for your mom.

If your mom is a gardener, how about a jar of seeds? 

Saturday, May 7, 2011

Last minute Mother's Day Project

It's been a busy week for me!  And Mother's Day is tomorrow.   Here's a cute mother's day flower pot project for the kids to make from our friends at All Kids Network.


She is sure to love this personalized flower pot with her favorite family pictures in it. Pick your favorite pictures for some of the flowers and write your own special message on the other flowers.
What you'll need:
  • 3" Clay Pot
  • Clay
  • Colored Popsicle Sticks
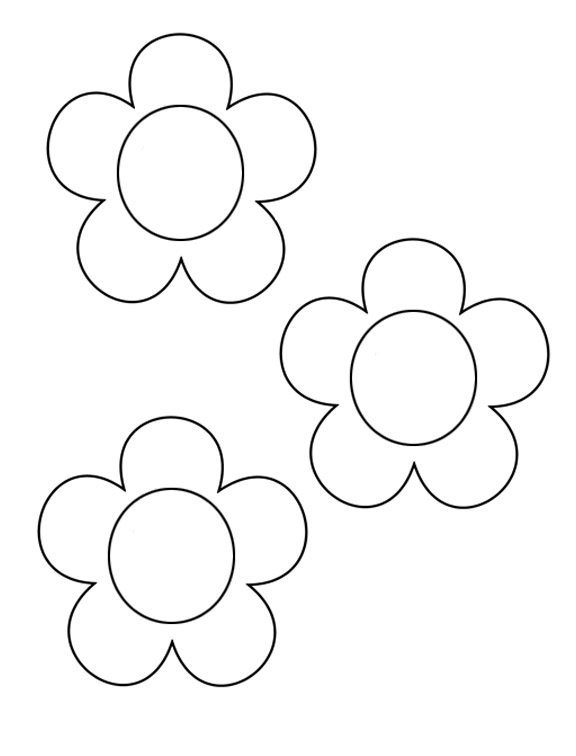
  • Flower Template (click here)
  • Construction Paper (many colors)
  • Scissors
  • Glue
  • Scotch Tape
  • Pictures
  • Paint, Markers, Crayons, etc.
How to make your Homemade Mother's Day Flower Pot Craft:
  • Decorate your clay pot however you would like! Put it aside to dry.
  • Print out the flower template provided above.
  • Cut out the template flowers, trace them onto construction paper and cut out the construction paper flowers.
  • Cut the center circle out of the template flower. Place onto construction paper flowers and trace around it. Carefully cut out the center circle in each of the construction paper flowers.
  • Tape pictures or sayings on the back of each flower so that they are visible through the hole.
  • Tape a popsicle stick to the bottom of each flower as the stem.
  • Cut leaves out of green construction paper and glue to each popsicle stick.
  • Fill the clay pot with clay. Stick the popsicle sticks into the clay to complete the craft!

Friday, April 15, 2011

Piggy Bank for your Tax refund!

Great craft for kids (or you) from our pal Martha.  Teach your little one the value of saving and recycling in one fell swoop.
This little piggy (bank) started off at the market as a bleach bottle. To make one, rinse an empty bottle with hot soapy water; let dry. Cut features such as eyes, ears, and nostrils from construction paper (ears should have tabs). Attach with double-sided tape, as shown. Tape patterned paper around body. Hot-glue empty thread spools on for legs. Cut a slot at the top for coins, and a hole in back to insert a pipe-cleaner tail.


Read more at Marthastewart.com: Bottle Bank - Martha Stewart Kids

Wednesday, February 16, 2011

Mini Me

The preschool kids did little self portraits using cardboard cutouts from Michael's.  And construction paper. It was a great exercise in colors and pasting. The activity took them about 15 minutes (of course, there was prep work ahead of time). Aren't they cute?

Want to give a handmade gift?

About Me

i love to create and make. A few of my favorite things to make are soaps, dreamy creams, bath and body products, knitting, beading, paper crafts, and more! I also teach classes and offer private lessons in candlemaking, soapmaking, creams and lotions, body scrubs and other bath time treats (teas, milks, melts, bombs).